Vacaero

Manufacturers of heat treating and brazing vacuum furnaces and controls, complete hot zone and vacuum furnace retrofits, thermal spray coatings, plasma, HVOF and paint coating services.

VAC AERO Service Experience Trust
Canada FrançaisAccessibility |
  • Home
  • Company
  • Vacuum Furnaces
  • Thermal Processing
  • Coatings
  • Service & Support
  • Resources
  • Contact Us
  • Request for Quote

Archives for February 2013

Understanding Vacuum Measurement Units

February 9, 2013 by VAC AERO International

Understanding Vacuum Measurement Units

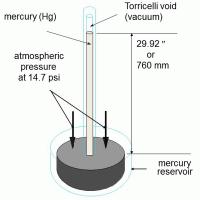
Vacuum gauges all measure the pressure readings in the range from atmospheric pressure down to some lower pressure approaching absolute zero pressure, which is not attainable. Some gauges read the complete range and others can only read a portion of the range, usually used for very low pressures.

If you have a typical vacuum furnace it is normal to have at least three electronic vacuum gauge heads mounted on the system to monitor the level of vacuum at selected positions. These gauge heads send signals back to the controls system and the vacuum readings are used to ensure that the vacuum pumps are working correctly and that the process chamber is at the correct low pressure (vacuum) for the specific process. To many casual observers the readings and names of the measuring units being used are like a foreign language, and they may well be because many names were derived in Europe. Let’s take a look at the different vacuum measurement units in use around the world and where the names came from.

Measuring the Grain Size of Specimens with Deformed Grains

February 4, 2013 by George Vander Voort

Measuring the Grain Size of Specimens with Deformed Grains

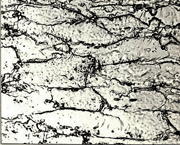
If a specimen has been cold worked, or it did not recrystallize after hot working, the grains will not be equiaxed and extra care must be taken when assessing the specimen’s grain size. Always test a longitudinally oriented plane first to determine if the grains are, or are not, equiaxed.

A low-carbon sheet steel was tested in the as-received condition (reportedly annealed), and after cold reductions in thickness of 12, 30 and 70%. Above 70% reduction, it can be quite difficult to reveal the ferrite grain boundaries well enough to get a precise measurement. Measurements were made on the three principal planes using the Jeffries planimetric method, the Abrams three-circle intercept method and the intercept method using directed parallel test lines.

  • Vacuum Heat Treating: Education & Training
    • News & Announcements
  • Vacuum Technology with The Heat Treat Doctor
  • Vacuum Pump Technology: Education & Training
  • Metallography with George Vander Voort
  • Q’s and A’s
  • “What’s Hot!” Newsletter
  • Glossary Metallurgical Terms
Vertical vacuum furnace specifications
horizontal vacuum furnace specifications
Vacuum Furnaces
Vacuum Furnace Zone Rebuilds
Technical Articles and Resources

Specialists in Vacuum Furnace Technology - High Quality Vacuum Furnace Manufacturer

COMPANY

  • VAC AERO Products & Services
  • Company History
  • Certificates & Approvals
  • Employment Opportunities
  • Values & Commitment
  • Corporate Sponsorship
  • Corporate Brochure
  • Terms & Conditions of Use
  • Privacy Policy

FURNACE MANUFACTURING

  • Horizontal Furnace Specs
  • Vertical Furnace Specs
  • Hot Zones
  • Control Systems
  • Custom Vacuum Furnaces
  • Quality Control
  • Service & Support
  • Furnace Request For Quote (RFQ) Form

THERMAL PROCESSING

  • Ontario – Plant 1
  • Ontario – Plant 2
  • Quebec – Thermal Processing Division
  • Specific Heat Treating & Brazing Approvals
  • Metallurgical Services Matrix

COATINGS

  • Quebec Coatings Division
  • HVOF Spray System
  • Specific Coating Approvals
  • Metallurgical Services Matrix

SERVICES & SUPPORT

  • Furnace Rebuilds & Upgrades
  • Hot Zone Rebuilds
  • Process Controls Upgrades
  • Ordering Parts
  • Field Service
  • Training Seminars

© Copyright 2016 VAC AERO - All rights reserved. Site Map Contact Terms and Conditions Privacy