 |
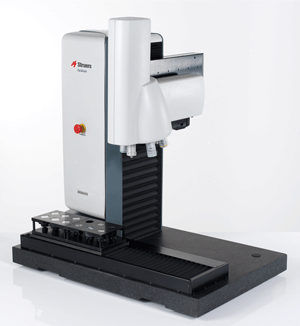
| DuraScan 70 Micro/macro hardness tester with extended load range from 10 gf – 10 kgf for Vickers and Knoop tests. |
One of the most serious limitations to Vickers hardness testing in the micro-load range (10-1000 gf or 0.098-9.81 N) has been the variability in measured hardness with loads ≤ 100 gf (≤ 0.98 N). In the literature four HV-load trends have been reported for this range. In the order of most common to least common, the trends are: the hardness decreases with decreasing load; the hardness increases slightly and then decreases; the hardness increases with decreasing load; and, the hardness is constant. Many publications have concentrated on the most common trend and attributed it to material factors. Samuels [1] stated, however, that these problems were due to microscope limitations, such as limited contrast and resolution, and visual perception limitations. At the same symposium, Westrich [2] showed that the SEM could be used to measure small Vickers indents and yield virtually constant hardness as a function of load.
An ASTM inter-laboratory “round robin” test program was conducted in the mid-1980s where seven specimens covering a very wide range of hardness were indented (five Vickers and five Knoop indents at each load) by one person with loads from 25-1000 gf. These indents were measured by at least twelve different people. The purpose of the study was to develop a precision and bias section for ASTM E 384. The results [3, 4] showed a high degree of variability when the same indents were measured and this variability increased with decreasing diagonal size. Three or four of the above mentioned trends were observed in the data for each specimen, indicating conclusively that this problem is, as Samuels suggested, a visual perception problem influenced by light microscope limitations. Furthermore, the very nature of the formulae used to calculate HV and HK creates an inherent precision problem as the load decreases and indent length decreases.
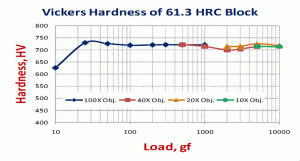
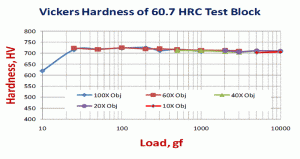
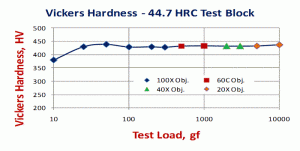
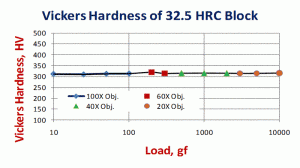
This presentation discusses experiments using the Struers DuraScan hardness testing system over a wide range of loads, 10-10,000 gf (0.098-98.1N) for HV and 10-2000 gf (0.098-19.6N) for HK, using objectives with magnifications from 10 to 150X and steel test blocks with a wide range of hardness. The results, Fig. 1, demonstrate that consistent HV results can be obtained with indents made at loads down to 25 gf on the hardest specimens with diagonals as small as about 7.5-8 µm. But, for smaller 10 gf indents, in the range of 5-6 µm for these specimens, results were not improved using a 150X objective with a screen magnification of about 3675X, although the 150X objective did yield better HK data. However, because the Knoop indent cavity shape is not geometrically-similar as a function of indent depth, the Knoop hardness will vary with load. Better optics do yield better HK-load curves as there is a strong tendency to undersize Knoop indents due to the poor visibility of the tips. Dark field creates much stronger contrast than bright field illumination which is particularly beneficial when measuring Knoop indents. Confocal microscopy offers higher resolution and ability to measure surface features, such as an indent cavity.
Reference
- L.E. Samuels, Microindentation Techniques in Materials Science and Engineering, ASTM STP 889, ASTM, Philadelphia, 1986, pp. 5-25.
- R.M. Westrich, Ibid, pp. 196-205.
- G.F. Vander Voort, Factors that Affect the Precision of Mechanical Tests, ASTM STP 1025, ASTM, Philadelphia, 1989, pp. 3-39.
- G.F. Vander Voort, Accreditation Practices for Inspections, Tests, and Laboratories, ASTM STP 1057, ASTM, Philadelphia, 1989, pp. 47-77.
George Vander Voort has a background in physical, process and mechanical metallurgy and has been performing metallographic studies for 47 years. He is a long-time member of ASTM Committee E-4 on metallography and has published extensively in metallography and failure analysis. He regularly teaches MEI courses for ASM International and is now doing webinars. He is a consultant for Struers Inc. and will be teaching courses soon for them. He can be reached at 1-847-623-7648, EMAIL: georgevandervoort@yahoo.com and through his web site: www.georgevandervoort.com
To View a listing of all George’s articles please click here
Read George Vander Voort’s Biography

