 A wide variety of surface treatments and coatings are applied to metals to enhance their performance, for example, to improve fatigue resistance, increase wear resistance, corrosion or oxidation resistance.
Some of these treatments involve diffusion of one or more elements into the metal or alloy followed by post heat treatments. These processes included the familiar processes of carburizing, nitriding, and carbonitriding but also included less familiar processes such as ion nitriding, chromizing and boronizing. There are also a variety of coatings that are deposited by electroless or electrolytic means, or by physical or chemical vapor deposition, or by thermal or plasma spray. The technological significance of these processes is enormous.
Metallographic examination of these surface layers is important in the development and implementation of these technologies. Metallographic preparation of such specimens is not a trivial matter as the affected surfaces can be badly damaged or altered by the use of poor practices. Beyond this, the preparation method must reveal the true structure so that it can be properly interpreted, measured, evaluated and documented. Every step of the procedure must be properly executed if the examination is to yield maximum value.
Sectioning is almost always required as the first step in the preparation sequence. This is a crucial step as substantial damage can be produced if this step is performed poorly. The adhesion of some coatings may not be strong and cutting may separate the coating from the substrate, especially if the cut begins in the substrate and ends in the coating. This puts the coating in tension, which is almost always detrimental. Always perform cutting so that the surface layers are in compression. Of course, for some components, such as a round shaft, there is no way to keep the entire coating in compression, unless you can rotate the shaft as it is being cut. This can be done with some precision saws, depending upon the diameter of the piece being cut. For certain delicate layers (particular in failure analysis studies) it may be necessary to encapsulate the part in a castable epoxy resin before sectioning; otherwise the surface layers may flake off and be lost.
For maximum edge retention, it is necessary to mount specimens before commencing the grinding and polishing steps. A free edge will always be rounded to some extent, regardless of the procedures used. But, mounting resins vary in their ability to provide edge protection. Polymeric resins will tend to shrink away from the encapsulated piece forming a small gap between specimen edge and mount. This gap must be avoided or minimized. A shrinkage gap creates a free edge where rounding will occur and also leads to seepage problems which may cause contamination of the polishing steps or bleed out of solvents or the etchant which will obscure the edge structure. Protective platings, such as electroless nickel, are helpful when done properly but are not a guarantee for edge retention. The plating must be compatible with its substrate, must adhere well, and must not interfere with the etching reaction or exhibit the same contrast as the coating.
Grinding may be done with a variety of products, such as traditional SiC paper, metal- or resin-bonded diamond disks, or rigid grinding discs. In general, one grinding step is adequate. The cut surface should be made with an abrasive cut-off saw or a precision saw. Both produce high quality cut surfaces with minimal damage depths. Consequently, coarse grinding abrasives are not needed, and should be avoided, as they produce excessive damage. Generally, one can commence grinding with a SiC paper with an abrasive size of 220-240-grit (P220 or P280) after abrasive cutting or 320-grit (P400) after use of a precision saw.
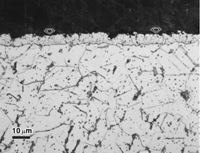
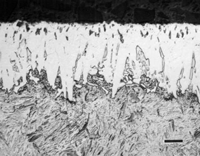
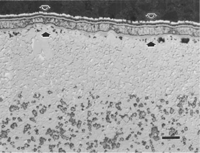
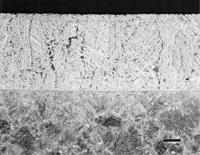
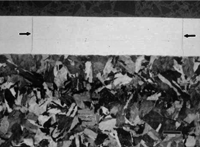
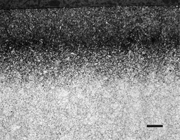
Polishing should be conducted using napless cloths. For the first rough polishing step, a woven silk cloth, such as the MD-Dur cloth, with 9- or 6-µm diamond abrasive produces excellent results with a good removal rate and an excellent surface finish. Other woven cloths, such as MD-Plan or MD-Pan, can be used if a more aggressive removal rate is required. Another alternative for the first polishing step is to use a rigid grinding disk, such as the MD-Allegro, which produce exceptional flatness. The RGD is more aggressive (for the same diamond abrasive size) than a cloth but the surface finish is not as good. However, the next step will improve the surface finish. The second polishing step often uses 3-µm diamond and a napless cloth is chosen, such as the synthetic chemotextile pads, e.g., MD-Pan, or a fine woven cloth, such as an MD-Dac or MD-Sat cloth. Depending upon the material being prepared, a 1-µm diamond step may be employed, or the next, and last, step may use either colloidal silica or alumina abrasives on a napless synthetic cloth, such as an OP-Chem cloth, or on a medium nap cloth, such as an MD-Floc or MD-Nap cloth. Some typical examples of good edge retention are given below in Figures 1 and 2.
George Vander Voort has a background in physical, process and mechanical metallurgy and has been performing metallographic studies for 43 years. He is a long-time member of ASTM Committee E-4 on metallography and has published extensively in metallography and failure analysis. He regularly teaches MEI courses for ASM International and is now doing webinars. He is a consultant for Struers Inc. and will be teaching courses soon for them. He can be reached at 1-847-623-7648, EMAIL: georgevandervoort (AT) yahoo (DOT) com and through his web site: www.georgevandervoort.com
To View a listing of all George’s articles please click here
Read George Vander Voort‘s Biography
|
(191 HV); acetic glyceregia etch; magnification bar is 100 µm long
|

