BY JEFF PRITCHARD
For many years, VAC AERO has been performing welding and heat treating operations on a landing gear component for a popular turboprop aircraft. Because of the part design, the welding operation, in particular, is complex and challenging and often involves substantial re-work.

In order to minimize the rate of re-work, VAC AERO undertook a comprehensive process review. The review determined that a minor design change could virtually eliminate re-work at welding. The assembly is a five-piece, tubular structure manufactured entirely from 4330V steel. It consists of a hollow tube approximately 1500mm long by 120mm in diameter, two fittings (upper and lower) that are TIG welded to each end of the tube and two backing rings that bridge the gaps between the fittings and the tube during the welding operation.
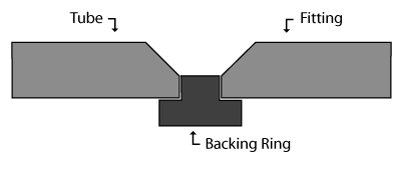
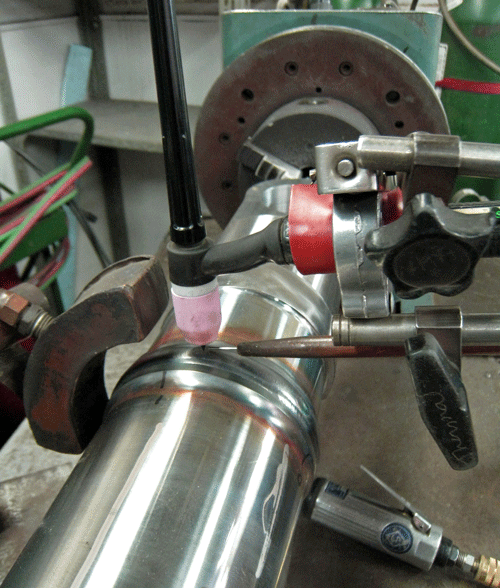
At one end of the tube, the backing ring is tack welded to both the tube and the lower fitting in four places every 90° with the welding operator making sure the gap between the tube and the fitting remains consistent. The structure of the weld joint is shown in Figure 1. The tack welded assembly is then transferred to a semi-automatic TIG welding station that rotates the assembly under a TIG torch. An oxyacetylene torch is used to pre-heat the area of the weldment to a temperature of around 700°F. This temperature must be maintained throughout the welding process. The backing ring is fused to the tube, then the lower fitting, at the roots of each joint. The root fusion passes are made in accordance with a very stringent certified weld schedule that governs key parameters such as the rotational speed and the settings for the TIG welding machine.

In the first step in the manufacture of the assembly, the components are cleaned of residual machining oils then assembled in a positioning fixture.
The assembly, pre-heat and root fusion operations are repeated to attach the upper fitting to the tube. However, at this point, the welding process becomes challenging. Heat from the pre-heat and welding operations causes expansion of gases within the tube. These gases attempt to exhaust from the tube as the final root pass closes the joint and seals the assembly. The exhaust of the gases during the welding process is a major source of porosity within the root fusion weld. As a result, the root fusion passes must be radiographically inspected. The rate of defects in the root fusions passes is unacceptably high, usually exceeding 10%. Defects must be manually ground out, re-welded and re-inspected by x-ray. This re-work negatively affects both cost and turn-around time.
After the root fusion passes are deemed acceptable, the assembly is returned to the welding station.
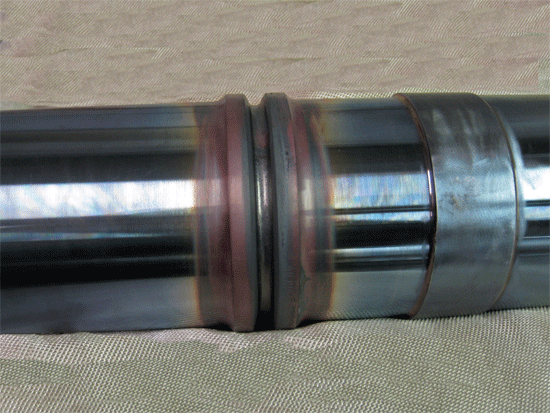
The joints are completed by making a number of weld passes with filler wire. A comprehensive dimensional inspection is then performed to check for distortion that has occurred during welding. Because of the relatively thin sections of the components being joined and the large amount of heat to which they are exposed during welding, misalignment of the longitudinal axes of the fittings relative to the longitudinal axis of the tube is common. Fortunately, this can be corrected by selective re-melting (using the TIG torch) of portions of the filler passes to “pull’ the axes back in alignment. Once welding is complete, the joints undergo another radiographic inspection as well as magnetic particle inspection.

The welded assembly then progresses to VAC AERO’s vacuum oil quench process for hardening.
Here, another unwanted phenomenon occurs. While the assembly is heated under vacuum, the gases sealed within the assembly remain at atmospheric pressure. The pressure differential between the inside and outside of the sealed assembly coupled with the ductility of the steel at the hardening temperature causes a ballooning effect in the tube of the assembly. While this effect does not damage the structural integrity of the tube or welds, it adds to the distortion that has already occurred in welding causing the heat treated assembly to significantly exceed its required dimensional tolerances. Recovery of dimensions to within tolerance must then be undertaken through a series of complicated hot straightening operations. In these operations, the assembly is restrained in a specially designed fixture, heated and forced to plastically deform back to within the required tolerances. Several hot straightening operations may be required before dimensional recovery is successful. These operations are labor-intensive and time-consuming and, if not performed with the utmost of care, create a significant risk of permanent damage to the part.
In the process review, it became obvious that the root cause of the welding defects and ballooning distortion was the sealed nature of the assembly. The solution was to add a vent hole to the assembly to allow gases to escape during welding and vacuum heat treating.
However, this was not as simple as it appeared. Because the assembly sees service in high stress and high fatigue application, an improperly placed vent hole could act as a stress raiser and lead to catastrophic failure of the assembly. A complete stress analysis of the part had to be performed by its designer to safely locate the vent hole. Ultimately, the hole was only 3mm in diameter and threaded so it could be mechanically plugged before the assembly went into service. However, the addition of the vent hole completely eliminated the ballooning effect and reduced welding defects to almost zero.
VAC AERO holds NADCAP accreditation for both welding and heat treating. The company specializes in TIG welding of hardenable alloy and stainless steels as well as superalloys.
