Rzeszow, Poland, (September 21, 2012) – Pratt & Whitney (United Technologies, East Hartford, CT) has qualified Vac-Aero Rzeszow (Plant 2), as a source of PWA 11-17 and -22 heat treatment processing for nonrotor applications. This new approval has now been added to the many other heat treating and coating accreditations that VAC AERO Poland has […]
Archives for September 2012
Measurement of Grain Size in Twinned FCC Alloys
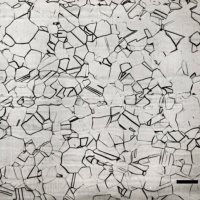
Grain size is probably the most frequent microstructural measurement due to its influence on properties and behavior/service performance. Grain size can be determined by several methods. Chart comparison ratings are probably the most often performed, as this method is fast and simple. But its accuracy is at best ± 1 G value.
An ASTM E-4 interlaboratory round robin test using Plate I of ASTM E 112 showed that chart ratings were biased with the rating being ½ to 1 G value coarser than the actual measured grain size. Similar studies have not been conducted with Plates II or III. Actual measurements of grain size are done by either the planimetric or the intercept methods, as defined in E 112. These are unbiased methods, as long as the grain boundaries were properly delineated by the etchant. Experience has shown that measuring the grain size of BCC metals is much easier than measuring the grain size of FCC metals and alloys that contain annealing twins. ASTM E 112 has two comparison charts for such metals; Plate II for specimens that exhibit a so-called “flat” etch appearance and Plate III for those that exhibit a grain contrast etchant response. Plate III was developed using copper specimens and the images are at 75X, while the other E 112 charts are at 100X. To further confuse the issue, Plate III expresses grain size in terms of d, the average grain diameter, calculated by taking the square root of the average grain area (which is the reciprocal of the number of grains per mm2), rather than as an ASTM grain size number, G.
Measurement of Grain Shape Uniformity
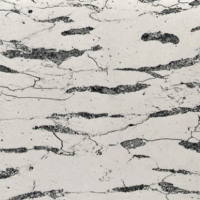
Cold working is well known to change the properties of metals and alloys. Deformation increases the strength of metals but usually reduces it toughness and leads to anisotropy of properties, that is, directionality. Hot working also produces similar affects, the microstructural results after hot work with low finishing temperatures may appear to be the same as from cold working.
Hot rolling of shapes, plate or bar, for example, elongates the nonmetallic inclusions in the deformation direction, which will reduce the isotropy of mechanical properties. Hot working can also lead to segregation being elongated parallel to the deformation direction, which also reduces isotropy. Reducing the finishing temperature, that is, the temperature of the steel at the last deformation pass, will promote “banding” – parallel alignment of the constituents into layers, such as alternate bands of ferrite and pearlite. This also promotes anisotropy of mechanical properties, chiefly toughness and ductility. Strength is not usually affected to a significant degree by banding, compared to toughness and ductility.
Come Visit Us at FNA 2012 – Booth 110
We’re excited to head down to Nashville for the Furnaces North America Conference and Expo. If you plan on attending the show, please be sure to stop by our booth number 110. Our sales reps will be available to answer questions about how VAC AERO can help your business with exactly the vacuum processing solutions […]


