Vacaero

Manufacturers of heat treating and brazing vacuum furnaces and controls, complete hot zone and vacuum furnace retrofits, thermal spray coatings, plasma, HVOF and paint coating services.

VAC AERO Service Experience Trust
Canada FrançaisAccessibility |
  • Home
  • Company
  • Vacuum Furnaces
  • Thermal Processing
  • Coatings
  • Service & Support
  • Resources
  • Contact Us
  • Request for Quote

Revealing the Microstructure of Tool Steels

March 15, 2012 by George Vander Voort

Revealing the Microstructure of Tool Steels

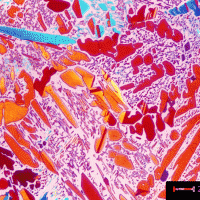
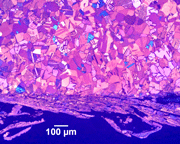
After we have properly prepared our tool steel specimens, it is generally best to examine them as-polished before etching – unless we are simply doing a routine test, for depth of decarburization, degree of spheroidization, and so forth. Examination of selectively etched tool steel microstructures by light microscopy provides more information than standard etchants, such as nital, picral or Vilella’s reagent. Further, the images are more suitable for quantitative measurements, especially by image analysis. Specimens must be properly prepared, damage free, if selective etchants, or color etchants, are to be applied successfully.

A number of etchants have been claimed to selectively etch certain carbides in tool steels. The response of these etchants has been evaluated using a variety of well-characterized tool steel compositions. While many are selective, they are often selective to more than one type of carbide. Furthermore, their use in image analysis must be evaluated carefully as measurements showed that the amount and size of the carbides are often greater after selective etching as many of these reagents outline and color or attack the carbides.

Metallographic Preparation of Tool Steels

February 21, 2012 by George Vander Voort

Metallographic Preparation of Tool Steels

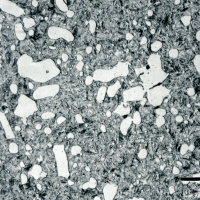
If we are to see the true microstructure of steels, such as tool steels, we must properly prepare them. For years, the writer has often been told by people that “we just do not have the time to properly prepare the specimens – this is the best we can do.”

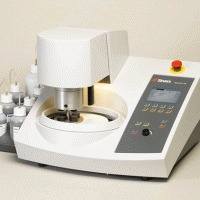
I would ask them how long it takes them to prepare a holder of 6 specimens. They would frequently give me times of one to two hours. They would look at me like I was crazy when I would say, “Let me show you how to prepare a holder in less than 30 minutes, and they will be perfect.” The “secret” to “perfect preparation” is first to section specimens while introducing as little damage as possible. Minimal damage takes a lot less time to remove than maximum damage! This paper presents guidelines and procedures for preparing tool steels – which can have a very wide range of hardness, and may be further complicated if the specimens are as-quenched (and, consequently, very prone to cutting and grinding damage).

Microstructure of Nitrided Steels

December 7, 2011 by George Vander Voort

Microstructure of Nitrided Steels

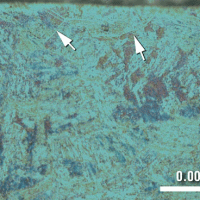
Nitriding is one of the most interesting and useful surface-hardening techniques. It is unique in that during the nitriding process, the specimen is not heated into the austenite phase, and it does not rely upon the formation of martensite to achieve high hardness and useful properties. It is heat treated prior to nitriding, forming tempered martensite to obtain the desired core properties unlike all other surface heat-treatment processes.

The processing associated with nitriding does have some advantages in avoiding problems such as quench cracking and distortion. It also has some side benefits in improved corrosion resistance and generation of beneficial residual compressive stresses, which improves fatigue resistance. Nitrided surfaces do exhibit high surface hardness, leading to improved wear resistance.

Introduction to Stereological Principles

December 7, 2011 by George Vander Voort

Introduction to Stereological Principles

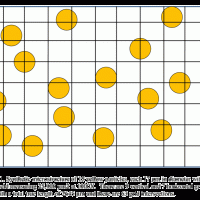
Although the fundamental relationships for stereology, the foundation of quantitative metallography, have been known for some time, implementation of these concepts has been restricted when performed manually due to the tremendous effort required. Further, while humans are quite good with pattern recognition, as in the identification of complex structures, they are less satisfactory for repetitive counting.

Many years ago, George Moore (1) and members of ASTM Committee E-4 on Metallography conducted a simple counting experiment. About 400 people were asked to count the number of times the letter “e” appeared in a paragraph without striking out the letters as they counted. The correct answer was obtained by only 3.8% of the people. Results were not Gaussian, however, as only 4.3% had higher values while 92% had lower values, some much lower. The standard deviation was 12.28. This experiment revealed a basic problem with manual ratings. In this case the subject was one very familiar to the test subjects, yet only 3.8% obtained the correct count. What degree of counting accuracy can be expected when the subject is less familiar, such as microstructural features? Image analyzers, on the other hand, are quite good at counting but not as competent at recognizing features of interest. Fortunately, there has been tremendous progress in the development of powerful, user-friendly image analyzers over the past two decades.

Introduction to Quantitative Metallography

December 7, 2011 by George Vander Voort

Introduction to Quantitative Metallography

For most of its history, metallographic observations have been largely qualitative in nature. The structure might be described as being relatively coarse or fine, or layered, or uniform. Particles might be labeled as globular or spheroidal, lamellar, acicular, or blocky. Microstructures were single-phase or duplex, and so forth.

Forty some years ago when I entered industry, chart ratings and visual examinations were the main approach toward quantitation. I can well remember the mill metallographers looking at spheroidized carbide tool steel structures and stating that it was, for example, 90% spheroidized (many raters would never say 100%, just as some teachers would never grade an essay at 100%!) or that it was 60% spheroidized and 40% lamellar tending to spheroidize. Or, without looking at the chart (a seasoned rater never did!), they would pronounce that the grain size was, for example, 100% 6 to 8 or perhaps 70% 8 and 30% 3 to 5 if it was duplex in appearance. 

Study of Selective Etching of Carbides in Steel

December 6, 2011 by George Vander Voort

Study of Selective Etching of Carbides in Steel

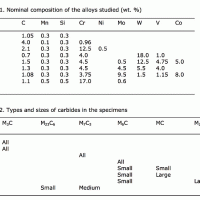
A number of etchants have been reported in the literature to selectively outline, outline and color, or attack specific types of carbides in steels. These etchants have been developed during the first half of the 20th century but have not been studied systematically since the development of modern analytical techniques. To evaluate these etchants, eight specimens (seven different compositions) with M3C, M23C6, M7C3, M6C, M2C and MC carbides were studied, first by electron-backscattered diffraction (EBSD) to verify the carbides present.

The matrix of each specimen was darkened to measure the total carbide content. Then, the various etchants were tried and the results were compared to past publication results. Quantitative measurements were made after each etchant was used. This revealed some minor differences with the prior literature and showed that, while useful for qualitative evaluations, they are not useful for quantitative measurements. Metallographers have used certain selective etchants for years to color specific carbides as an aid to phase identification. However, only a few of these etchants have had wide usage (e.g., alkaline sodium picrate to color cementite since 1906 due to the work by Kourbatoff). The behaviors of the others are less well known. Even for alkaline sodium picrate, however, few metallographers know that it also outlines and colors M6C carbides.

Metallographic Specimen Preparation for Electron Backscattered Diffraction

October 30, 2011 by George Vander Voort

Metallographic Specimen Preparation for Electron Backscattered Diffraction

Although some publications have claimed that mechanical specimen preparation is inadequate for producing damage-free specimens for EBSD, this is certainly not true. Our methods have concentrated upon producing the best possible surfaces using an automated grinder-polisher with standard consumable products in a reasonable amount of time and at low cost. Furthermore, these methods are highly reproducible as demonstrated by extensive tests on many metals and alloys from aluminum to zirconium.

Success depends first, and foremost, upon limiting cutting damage by using the proper blade and cutter. Next, commence grinding with the finest abrasive that will remove the cutting damage in a reasonable time and make all of the specimens in the holder co-planar. Polishing is done in counter rotation with a low holder rotational speed to keep the cloth as uniformly covered with abrasive and lubricant as possible. The grinding and polishing steps must keep the surface perfectly flat for best results. After the final polish, a general purpose etch can be applied, with the specimens in the holder, to evaluate the success of the preparation and determine what the structure is. Then, remove the etched surface by repeating the final step but with about half the required time. Preparation procedures are influenced by the crystal structure of the specimen. Face-centered cubic specimens will always exhibit more damage from each step than less ductile HCP and BCC metals and alloys.

  • « Previous Page
  • 1
  • …
  • 5
  • 6
  • 7
  • 8
  • Next Page »
  • Vacuum Heat Treating: Education & Training
    • News & Announcements
  • Vacuum Technology with The Heat Treat Doctor
  • Vacuum Pump Technology: Education & Training
  • Metallography with George Vander Voort
  • Q’s and A’s
  • “What’s Hot!” Newsletter
  • Glossary Metallurgical Terms
voort
Vertical vacuum furnace specifications
horizontal vacuum furnace specifications
Vacuum Furnaces
Vacuum Furnace Zone Rebuilds
Technical Articles and Resources

Specialists in Vacuum Furnace Technology - High Quality Vacuum Furnace Manufacturer

COMPANY

  • VAC AERO Products & Services
  • Company History
  • Certificates & Approvals
  • Employment Opportunities
  • Values & Commitment
  • Corporate Sponsorship
  • Corporate Brochure
  • Terms & Conditions of Use
  • Privacy Policy

FURNACE MANUFACTURING

  • Horizontal Furnace Specs
  • Vertical Furnace Specs
  • Hot Zones
  • Control Systems
  • Custom Vacuum Furnaces
  • Quality Control
  • Service & Support
  • Furnace Request For Quote (RFQ) Form

THERMAL PROCESSING

  • Ontario – Plant 1
  • Ontario – Plant 2
  • Quebec – Thermal Processing Division
  • Specific Heat Treating & Brazing Approvals
  • Metallurgical Services Matrix

COATINGS

  • Quebec Coatings Division
  • HVOF Spray System
  • Specific Coating Approvals
  • Metallurgical Services Matrix

SERVICES & SUPPORT

  • Furnace Rebuilds & Upgrades
  • Hot Zone Rebuilds
  • Process Controls Upgrades
  • Ordering Parts
  • Field Service
  • Training Seminars

© Copyright 2016 VAC AERO - All rights reserved. Site Map Contact Terms and Conditions Privacy